Dear Mom,
I can’t imagine missing you more than I do today. As much as today is all about me, it’s really all about us. On this day 42 years ago when you pushed me out breech (without any pain medication!), everything changed — obviously for me, but I know it did for you, too.
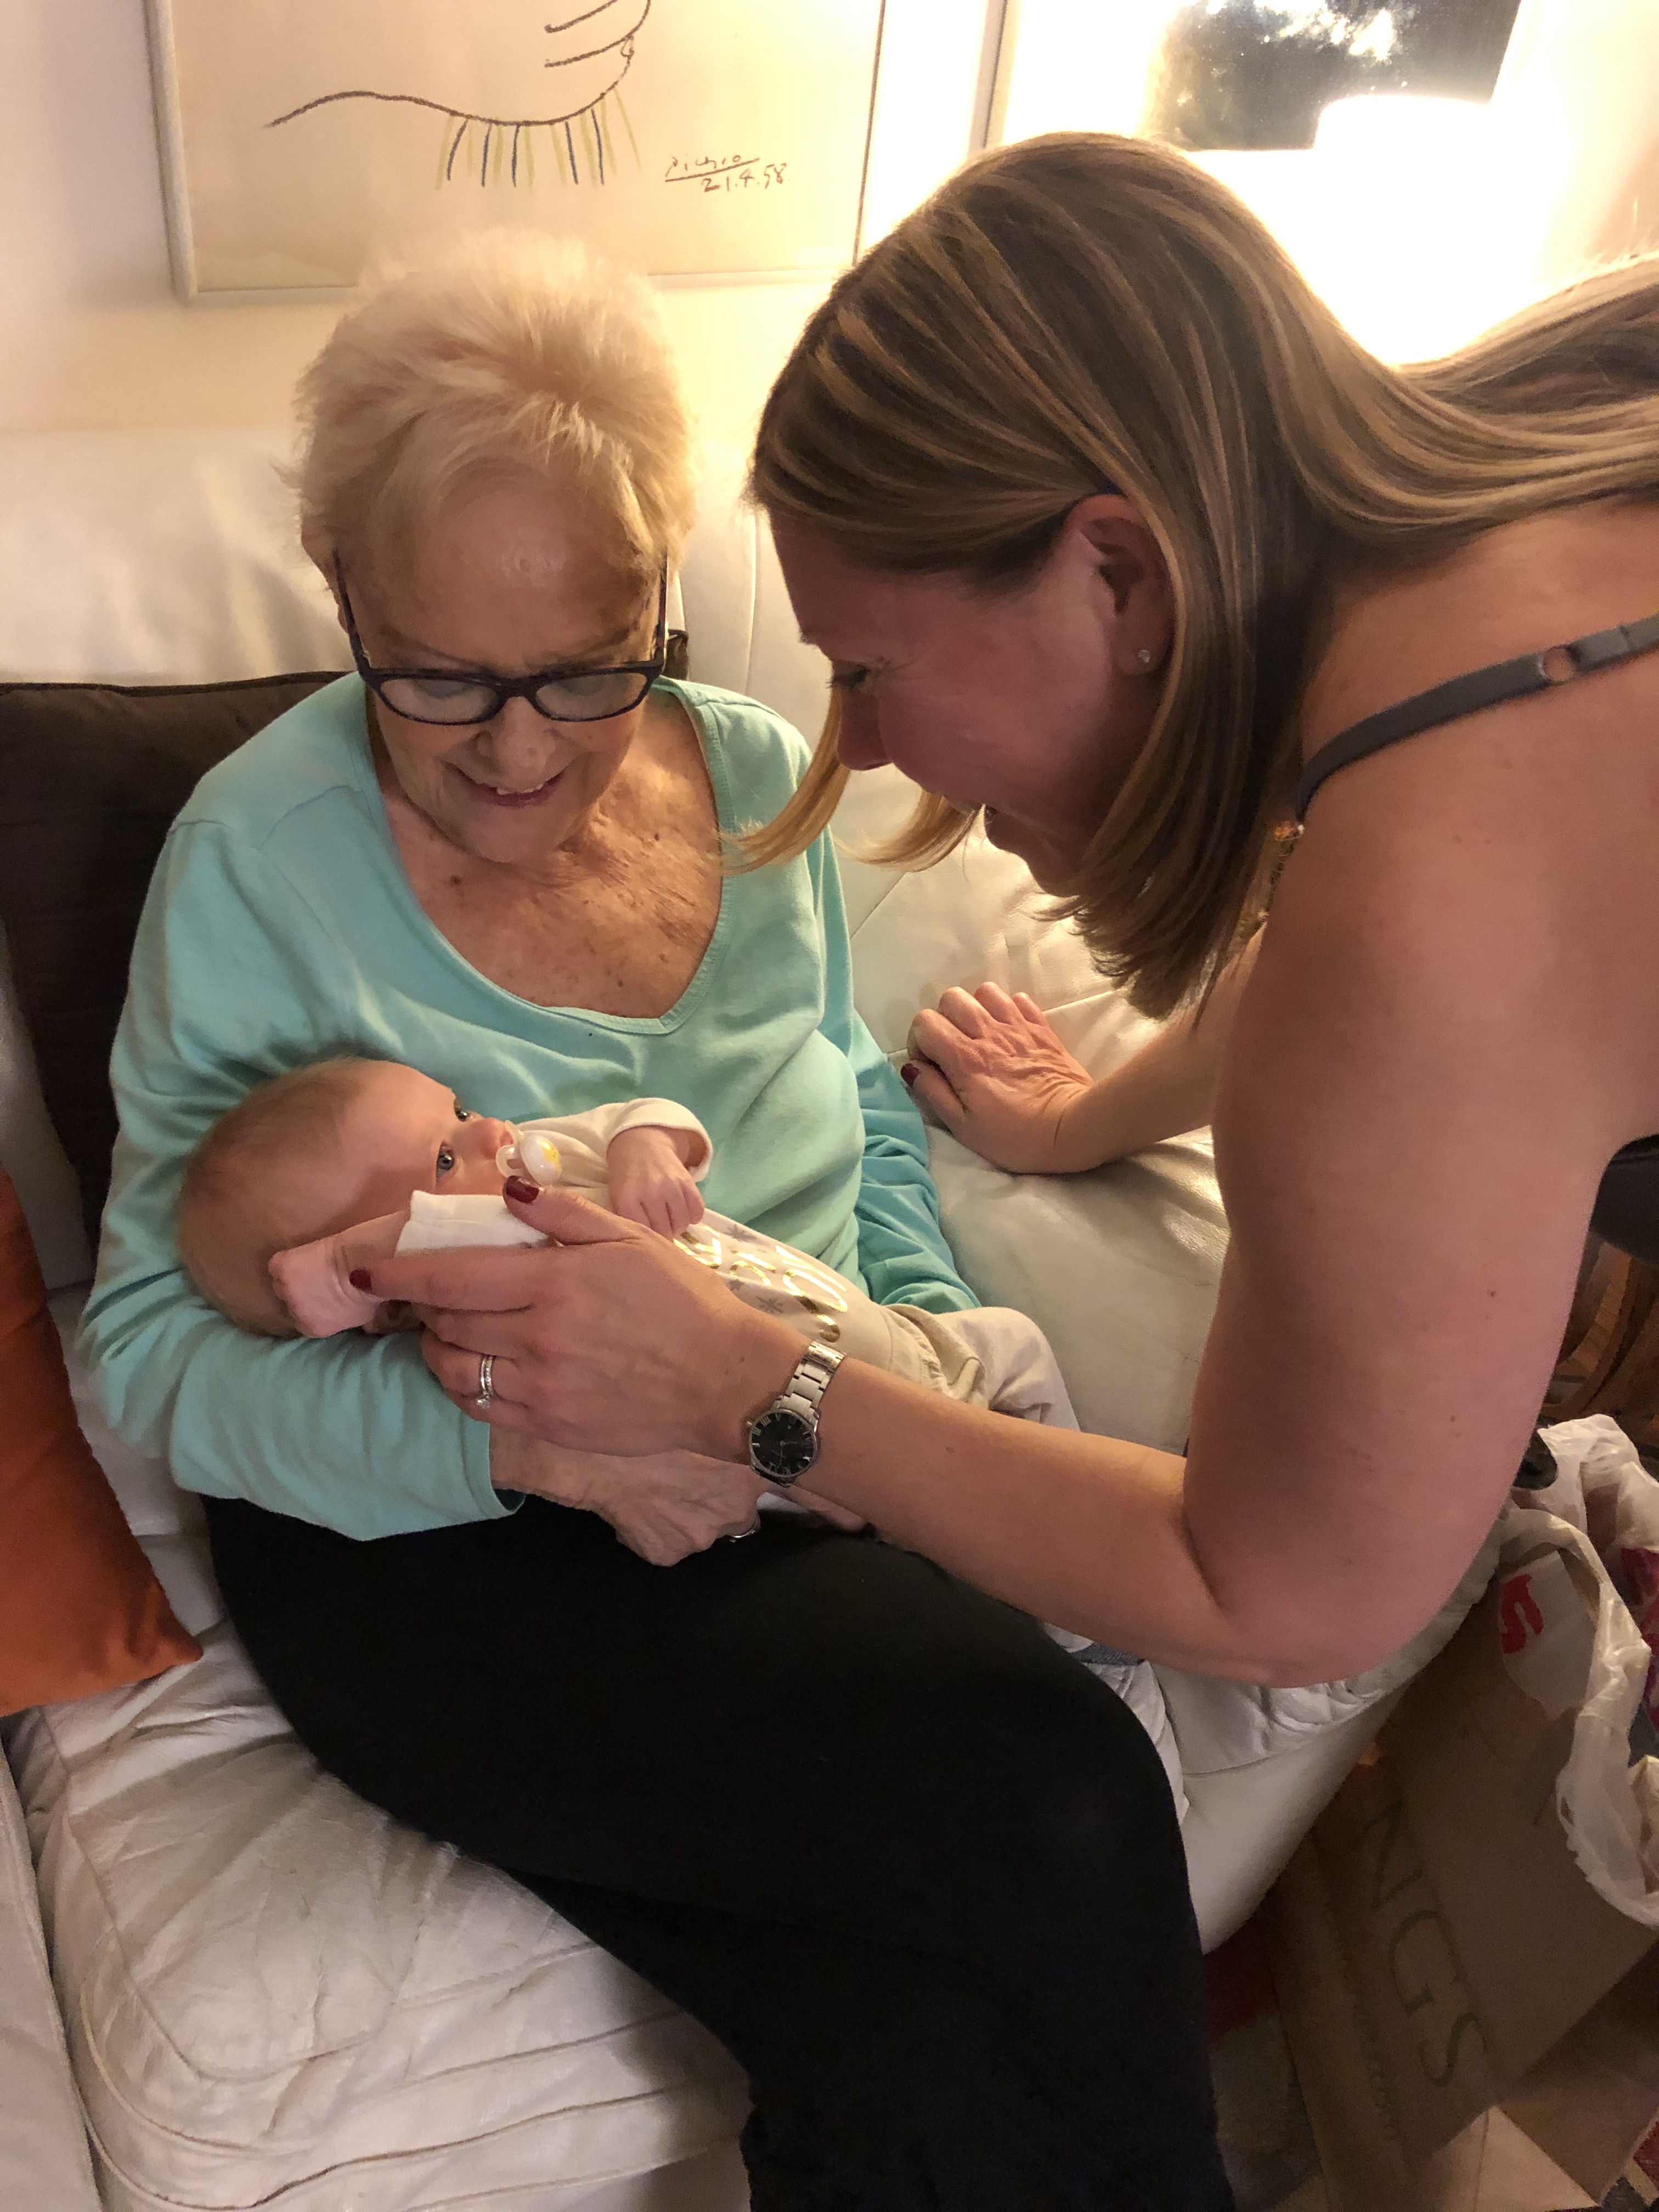
Now that I’m a mom, everything has changed again. I see things with a new light and perspective, yet I’m only just beginning to understand how hard this journey is. I’ve only just begun to see how much you give of yourself when you have a child — and how much you gave of yourself for me. I’ve been crying for the past two days. I know that’s OK, I know that I’ll be grieving for a long, long time, but this birthday has been harder than I ever could have imagined it would be. When Addie saw me crying yesterday, she gave me the biggest smile. She then attempted to give me a hug, but ended up falling over midway and then fell asleep in that pose. Classic Addie. I wish you could have had more time with her. There is A LOT of you in her. She’s bubbly, energetic, strong-willed, chatty, and hilarious. She cracks herself up and has the most infectious giggle. She can brighten someone’s day with just a smile. There is a lot of you in her.
It’s been hard getting the mail recently, seeing all the birthday cards and knowing I’ll never receive one from you again. I loved your cards. And even more, I loved the chocolate cakes you mailed to me in college on my birthday, beautifully wrapped and tied with Tiffany ribbon. Enough for me to share with all my roommates, you would say. And boy did they love those cakes, too. You’ve made a lot of people smile in your life.
I’ve been seeing a grief counselor to help me work through losing you, and today she reminded me that if there were ever a day that was all about the connection that you and I had, it would be today. She’s very perceptive and has already observed that we had a very special connection. As she put it, the perfect balance between mother and daughter and friends. And she reminded me how rare that is. I cherish our relationship so much, especially the fact that we talked almost every day. I know that was rare. I loved that I could call you anytime and you could always tell by the sound of my voice what was going on. It was really hard not to be able to call you on the day I had Addie — the happiest day of my life, but so bittersweet because you were in the hospital and not doing well. If there ever was a day I needed you, Mom, it was on the day I birthed my daughter. It wasn’t an easy birth, and was quite scary at times, but the euphoria that followed was like nothing I have ever felt before. That first cry, that first cuddle. Nothing compares to holding your baby on your chest for the first time. I know you know that, but boy how I wanted to share that joy with you. I’m still heartbroken that I couldn’t, and that it would be days before we talked, when you still couldn’t really process what had happened. I will be forever grateful that you were able to make it to our wedding and see Andrew and I start our life together. But I will be forever saddened that you weren’t with me when Addie came into this world, that I couldn’t hold your hand or hear your voice tell me that everything would be OK.
I never told you that I lost a pregnancy before Addie. You were dealing with a lot at the time and I decided that you should focus on your health and healing, not mine. But I will always remember the look on your face when we told you I was pregnant, on Dad’s birthday with a card for “Opa” and the sonogram inside. I could feel your joy that day, and again on the day we called you from the car to tell you that you it was a girl. (And who could forget your countless phone calls and texts from that day forward trying to get her name out of us.) But that’s who you were, and I couldn’t imagine life any other way.
Thank you for raising me with so much love and confidence, for everything you sacrificed to provide for me, for all of yourself that you’ve given to me. Thank you for letting me spread my wings to explore the world, and coming to visit me everywhere I landed. Thank you for trusting me to make my own decisions and pave my own path, and for holding my hand along the way. I would not be where I am today, or be the person that I am, if it weren’t for you — and your never-ending love. I love you and I miss you.